みなさん,こんにちは。
シンノユウキ(shinno1993)です。
機械学習にはPythonを使う必要がある,ということはよく言われているかと思います.しかし,Googleから公開されているTensorFlowのJavaScript版であるTensorFlow.jsを利用することで,ブラウザ上で手軽に機械学習を行うことができます.今回はその方法と簡単な例を紹介したいと思います.
ではいきましょう!
TensorFlow.jsとは?
はじめに,今回紹介するTensorFlow.jsを紹介したいと思います.
TensorFlow.jsのオリジナルであるTensorFlowというのは,Googleが公開している機械学習用のオープン・ソースのライブラリです.PythonやJavaなどから利用できるAPIを備えています.
TensorFlow.jsはそのJavaScript版です.ブラウザ上で機械学習モデルのトレーニングや,そのデプロイできるようになります.
またトレーニングだけでなく,既存の学習済みモデルを読み込んで利用したり,そのモデルを再学習することができるようになります.機械学習の成果をWeb上で利用するためには最適なツールと言えるでしょう.
公式ページは以下からご確認ください.

MNISTのPredictionをブラウザでやってみる
手始めに,Kerasで学習済みのモデルをTensorFlow.jsで読み込み,ブラウザ上でPredictionしてみましょう.
KerasでMNIST学習済みモデルを作成しよう!
まずは,Kerasでモデルを構築し,MNISTで学習させて,TensorFlow.jsに渡す学習済みモデルを作成しましょう.ここでは,Google Colabを用いて,こちらのコードを使用して学習させました.
モデルをTensorFlow.jsで読める形に変換しよう!
作成したモデルは,そのままの形ではTensorFlow.jsに渡すことができません.TensorFlow.jsで利用できる形に変換してあげましょう.以下のコードのようにしてください.
model.save('model.h5')
!pip install tensorflowjs
!tensorflowjs_converter --input_format keras \
                       model.h5 \
                       target_path
まずモデルを保存し,tensorflowjsのconverterを使用してモデルを変換させます.
このモデルをダウンロードしておきましょう.
HTMLコードはこちら!
では実際のHTMLコードを示します.なお,こちらのコードは以下の記事を参考にしています.
<!DOCTYPE html>
<html lang="ja">
<head>
    <script src="//cdnjs.cloudflare.com/ajax/libs/numeral.js/2.0.6/numeral.min.js"></script>
    <script src="https://cdn.jsdelivr.net/npm/signature_pad@2.3.2/dist/signature_pad.min.js"></script>
    <script src="https://cdn.jsdelivr.net/npm/@tensorflow/tfjs@0.13.0"> </script>
    <link rel="stylesheet" href="https://stackpath.bootstrapcdn.com/bootstrap/4.1.3/css/bootstrap.min.css" integrity="sha384-MCw98/SFnGE8fJT3GXwEOngsV7Zt27NXFoaoApmYm81iuXoPkFOJwJ8ERdknLPMO" crossorigin="anonymous">
    <meta charset="utf-8">
    <meta name="viewport" content="width=device-width, initial-scale=1">
    <title>ブラウザ上でMNISTをTensorFlow.jsで認識する</title>
    <style>
        .row{
            margin-bottom: 15px;
        }
    </style>
</head>
<body>
  <div class="container" style="max-width:850px;">
    <h1 class="title">ブラウザ上でMNISTをTensorFlow.jsで認識する</h1>
    <h2 class="subtitle">Kerasで学習ずみのモデルを使用</h2>
    <div class="row">
        <div class="col">
            <canvas id="draw-area" width="280" height="280" style="border: 2px solid;"></canvas>
        </div>
    </div>
    <div class="row">
        <div class="col">
            <button id="predict-button" class="btn btn-primary" type="button" onclick="prediction()" disabled>Prediction</button>
            <button class="btn btn-secondary" type="button" onclick="reset()">Reset</button>
        </div>
    </div>
    <div class="row">
        <div class="col">
            <table class="table">
                <thead>
                    <tr>
                        <th>Number</th>
                        <th>Accuracy</th>
                    </tr>
                </thead>
                <tbody>
                    <tr>
                        <th>0</th>
                        <td class="accuracy" data-row-index="0">-</td>
                    </tr>
                    <tr>
                        <th>1</th>
                        <td class="accuracy" data-row-index="1">-</td>
                    </tr>
                    <tr>
                        <th>2</th>
                        <td class="accuracy" data-row-index="2">-</td>
                    </tr>
                    <tr>
                        <th>3</th>
                        <td class="accuracy" data-row-index="3">-</td>
                    </tr>
                    <tr>
                        <th>4</th>
                        <td class="accuracy" data-row-index="4">-</td>
                    </tr>
                    <tr>
                        <th>5</th>
                        <td class="accuracy" data-row-index="5">-</td>
                    </tr>
                    <tr>
                        <th>6</th>
                        <td class="accuracy" data-row-index="6">-</td>
                    </tr>
                    <tr>
                        <th>7</th>
                        <td class="accuracy" data-row-index="7">-</td>
                    </tr>
                    <tr>
                        <th>8</th>
                        <td class="accuracy" data-row-index="8">-</td>
                    </tr>
                    <tr>
                        <th>9</th>
                        <td class="accuracy" data-row-index="9">-</td>
                    </tr>
                </tbody>
            </table>
        </div>
    </div>
  </div>
  <script src="https://code.jquery.com/jquery-3.3.1.slim.min.js" integrity="sha384-q8i/X+965DzO0rT7abK41JStQIAqVgRVzpbzo5smXKp4YfRvH+8abtTE1Pi6jizo" crossorigin="anonymous"></script>
  <script src="https://cdnjs.cloudflare.com/ajax/libs/popper.js/1.14.3/umd/popper.min.js" integrity="sha384-ZMP7rVo3mIykV+2+9J3UJ46jBk0WLaUAdn689aCwoqbBJiSnjAK/l8WvCWPIPm49" crossorigin="anonymous"></script>
  <script src="https://stackpath.bootstrapcdn.com/bootstrap/4.1.3/js/bootstrap.min.js" integrity="sha384-ChfqqxuZUCnJSK3+MXmPNIyE6ZbWh2IMqE241rYiqJxyMiZ6OW/JmZQ5stwEULTy" crossorigin="anonymous"></script>

  <script>
    // init SignaturePad
    const drawElement = document.getElementById('draw-area');
    const signaturePad = new SignaturePad(drawElement, {
       minWidth: 6,
       maxWidth: 6,
       penColor: 'white',
       backgroundColor: 'black',
    });

    // load pre-trained model
    let model;
    tf.loadModel('./model/model.json')
        .then(pretrainedModel => {
            document.getElementById('predict-button').removeAttribute('disabled', false);
            model = pretrainedModel;
    });

    function getImageData() {
      const inputWidth = 28;
      const inputHeight = 28;

      // resize
      const tmpCanvas = document.createElement('canvas').getContext('2d');
      tmpCanvas.drawImage(drawElement, 0, 0, inputWidth, inputHeight);

      // convert grayscale
      let imageData = tmpCanvas.getImageData(0, 0, inputWidth, inputHeight);
      for (let i = 0; i < imageData.data.length; i+=4) {
        const avg = (imageData.data[i] + imageData.data[i+1] + imageData.data[i+2]) / 3;
        imageData.data[i] = imageData.data[i+1] = imageData.data[i+2] = avg;
      }
      return imageData;
    }

    function getAccuracyScores(imageData) {
      const score = tf.tidy(() => {
        // convert to tensor (shape: [width, height, channels])
        const channels = 1; // grayscale
        let input = tf.fromPixels(imageData, channels);
        // normalized
        input = tf.cast(input, 'float32').div(tf.scalar(255));
        // reshape input format (shape: [batch_size, width, height, channels])
        input = input.expandDims();
        // predict
        return model.predict(input).dataSync();
      });
      return score;
    }

    function prediction() {
      const imageData = getImageData();
      const accuracyScores = getAccuracyScores(imageData);
      const maxAccuracy = accuracyScores.indexOf(Math.max.apply(null, accuracyScores));

      const elements = document.querySelectorAll(".accuracy");
      elements.forEach(el => {
        el.parentNode.classList.remove('table-success');
        const rowIndex = Number(el.dataset.rowIndex);
        if (maxAccuracy === rowIndex) {
          el.parentNode.classList.add('table-success');
        }
        var formatedNumber = numeral(accuracyScores[rowIndex]).format('0.00%');
        el.innerText = formatedNumber;
      })
    }

    function reset() {
      signaturePad.clear();
      let elements = document.querySelectorAll(".accuracy");
      elements.forEach(el => {
        el.parentNode.classList.remove('table-success');
        el.innerText = '-';
      })
    }

  </script>
</body>
</html>
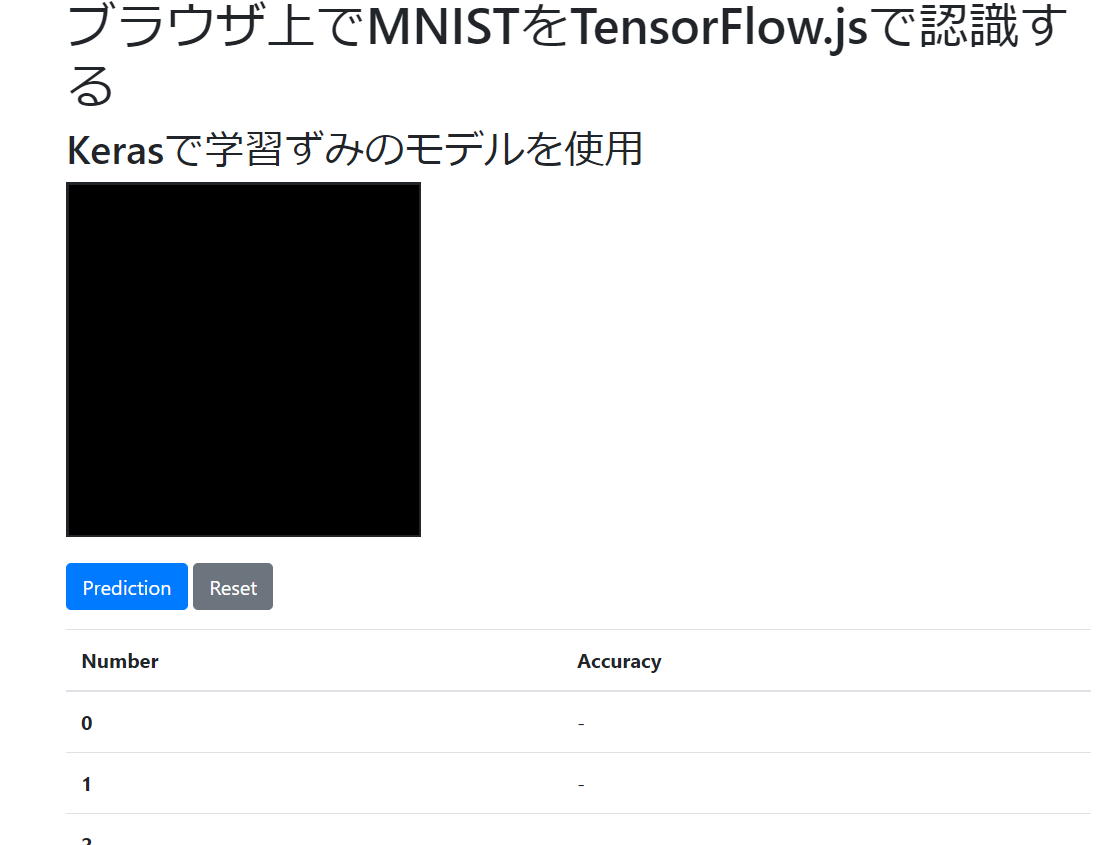
実際にHTMLを表示してみると,以下のようなページが表示されます.

ここで紹介したコードでは,Canvasに書いた文字をPredictionするとその文字がどれに該当するのかを予測することができます.
まとめ
今回はKerasで学習したモデルをブラウザ上で利用するためのライブラリ:TensorFlow.jsを紹介しました.Python環境だけでなく,JavaScriptでも利用できるので機械学習を活用する場が広がりますね.参考になれば幸いです.
